


Black Box III Multispark Instructions
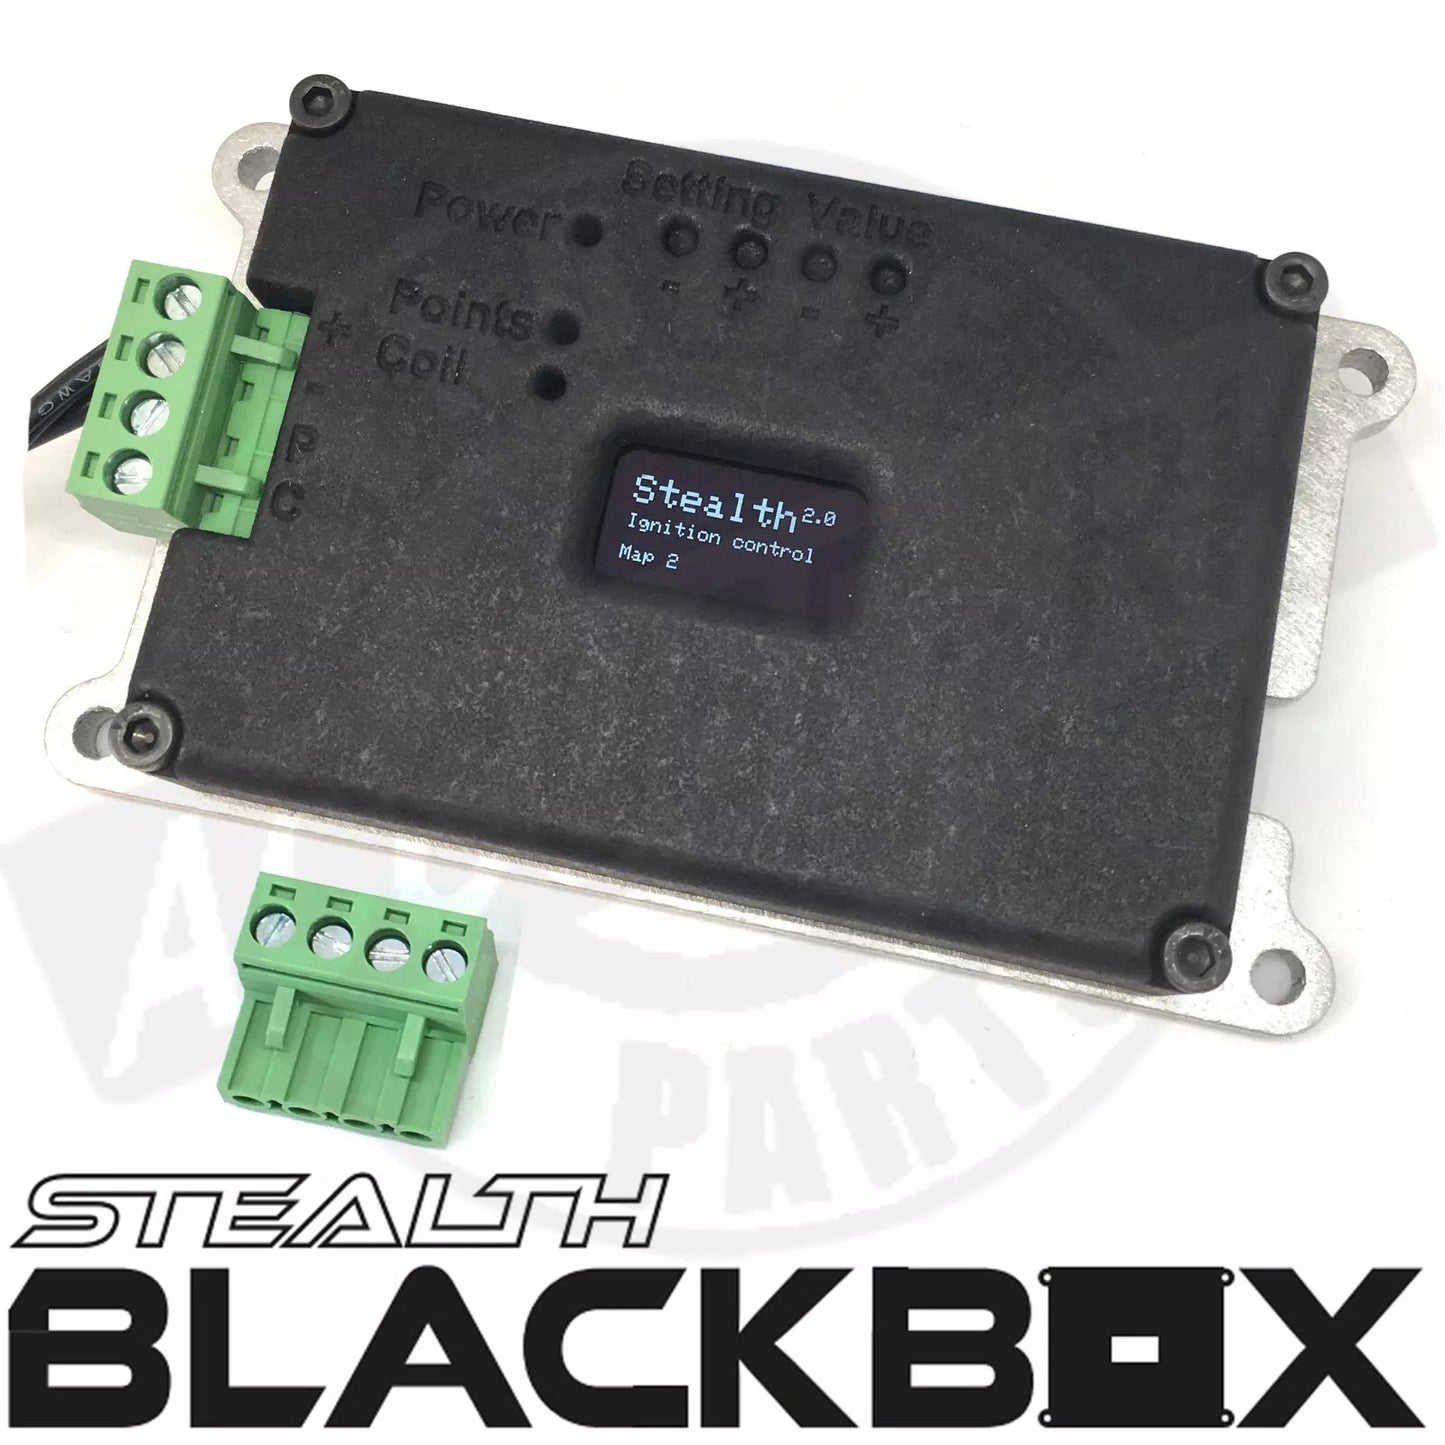
STEALTH BLACK BOX III WITH MULTISPARK
Pre -Installation.
Before setting the Box up to use all the functions, your distributor will need to have the advance mechanism locked, this is usually done by removing the advance springs and using lock wire to lock the mechanism.
Once this has been done the distributor should be refitted and car made to run before fitting the black box, this will identify any problems at this point. The car will have no advance, but this will not affect low RPM running.
STEALTH BLACK BOX III Set up
We would recommend placing the unit inside the car, this is a delicate piece of electronics and should not be placed inside the engine bay.
The unit is has been supplied with two plugs, this makes it easy to make a loom with multiple installation points, or to remove the box from the car and power on the work bench for easy programming.
Initial wiring and set up:
The unit has a simple positive and negative connection and is wired in line between the coil and distributor.
Connect the + Terminal to a live feed that is controlled from the ignition key
Connect the – Terminal to Earth
Remove the wire from the negative terminal of the coil that runs to the distributor, extend this wire and connect to the P Terminal
Connect the C Terminal of the Black Box to the negative side of coil.
There are 2 pairs of settings buttons, a left pair and a right pair.
Use the left pair to navigate through the menu
Use the right pair to make the required adjustments
If you have a 4-cylinder car the car can be started with no further adjustments.
You can now move to the Engine sync section at the end if you wish
IF your car is not 4 cyl, we suggest you use map 2 and adjust number of cylinders , the map will suffice and can then be adjusted once running to get better performance.
Turn on the ignition and the black box will now come on showing the splash screen and loaded map number. Once loaded adjustments can be made.
Press the + button on the left pair to open the setting menu
First option is map selection, if you wish to change the map use the right pair to adjust to the number required, once adjusted the unit will re-boot to show the new map number.
If you wish to make further adjustment you will need to reopen the menu buy pressing the left pair + button, then you can navigate the options with the left pair of buttons and make adjustments with the right Pair of buttons
Map number:
The default is Map is Map 1
Map 1 this is a BMC fast Road map but can be used on any 4 cyl engine without issue
Map 2 is a standard average 4 Cyl Map
Map 3 is blank
Advance offset-
For initial set up (default is 10 BTDC) this is set to roughly what the initial will be.
Once synced to the engine this is used to adjust your initial advance.
Number of Cylinders:
2, 4 ,6 ,8
RPM advance
Adjust advance at RPM points from 500 - 6500+ in 500 increments, The black box will produce a Linea curve between these points.
Vacuum Advance
Shown in Hg inches of Mercury
Minimum Vacuum where advance will start
Maximum Vacuum where advance will end
Maximum total Vacuum advance.
The advance will be a linier line from zero at start vacuum setting to the maximum advance at maximum vacuum setting
Boost Retard
Shown in Bar
Minimum boost where retard will start
Maximum boost where retard will end
Maximum total boost retard.
Rev Limiter
Set limit from 2000 -9500
Set from Hard 1 to soft cut 6
Coil on Time
This is the time the coil is set to charge. Default is 5ms, normally there is no reason to change
This, adjustments should be made on a trial-and-error basis.
Points input
Points input should be set to yes for points.
For electronic ignition normally set to no but should be tried on both.
Some aftermarket electronic ignitions may work better on the points setting
depending how their CPU has been programmed.
MultiSpark
Off
Start only: Only works on cranking
Start and Run: Works on cranking and tick-over, reducing to one spark at 2000 RPM
Save option
If adjustments have been made, they need to be saved now. Use the right pair + button to save.
IMPORTANT:
All adjustments are instant and can be made while the car is running but will be lost if the car
is switched off, if the final save option in the menu has not been used.
Default Settings
Use the left pair of buttons together and hold for 5 seconds to re-set default settings
Engine Sync
After fitting the Black box, and making any initial settings, your engine timing needs to be synced to your black box
The car should be started, be ready to adjust distributor as the timing will now have changed. The engine timing should be set to match the Timing off set figure on the black box. (default 10 BTDC)
Once this has been synced the timing can be adjusted from the box alone and no more physical changes need to be made on the distributor.